Online security is a crucial priority for any website in the current digital age. SSL (Secure Sockets Layer) certificates are a fundamental part of that security, as they encrypt communication between the user's browser and the web server, thus protecting the data and privacy of the site's visitors. If your website is built on WordPress, implementing SSL is an essential task to ensure the security and confidence of users. In this article, we will offer you specific instructions on how to deploy SSL on WordPress websites so you can make the most of this essential security measure.
Step 1: Chose the Suitable SSL Certificate
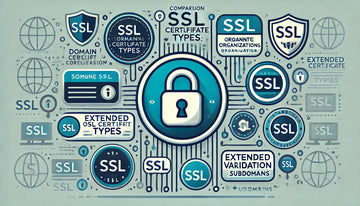
Before you deploy SSL to your WordPress site, you need to get an SSL certificate. You can get it through a trusted certification authority (CA) or web hosting provider. Here are some types of SSL certificates you can consider:
- Certificate of Validation of Domain (DV): This type of certificate validates the domain ownership and is suitable for personal websites and blogs.
- Organization Validation Certificate (OV): L certificates require more rigorous validation and are suitable for websites of organizations and companies.
- Extended Validation Certificate (EV): EV certificates offer the highest level of validation and display the green address bar on browsers, indicating a high degree of reliability.
- Wildcard Certificate: These certificates protect a main domain and all their subdomains.
Choose the certificate that best suits your needs and budget.
Step 2: Set up the SSL Certificate with your Accommodation Supplier
If your web hosting provider offers SSL certificates, you can set them directly from your control panel. Here are the general steps to do this:
- Log in to your web hosting account.
- Find the SSL section or security.
- Select the option to add an SSL certificate.
- Follow the instructions provided to complete the configuration process.
Step 3: Install and Configure a WordPress SSL Plugin
Once you've set up the SSL certificate with your hosting provider, it's time to set up WordPress to use SSL effectively. This involves installing and setting up an SSL plugin, such as "Really Simple SSL" or .WP Force SSL. Here are the general steps to do so:
- Log in to your WordPress Management Panel.
- Go to Plgins and select Add New.
- Find an SSL plugin, like Really Simple SSL.
- Install and activate the plugin.
- Once activated, the plugin will guide you through the configuration process. Normally, you just need to click on a button to enable SSL on your site.
Step 4: Update URLs on your WordPress Site
After enabling SSL on your WordPress site, it is important to make sure that all URLs on your site use "https://s instead of http://. To do this, follow these steps:
- Go to Adjusts on the WordPress Management Panel.
- Select "General."
- In the WordPress Address and "Detection of the Website," it changes "http:// to https://.."
- Click Save Changes.
Step 5: Verifies and Correct Mixed Content
Once you have updated the URLs on your site, it is important to check for mixed content on your website. The mixed content refers to the presence of (not safe) HTTP elements on a HTTPS (safe) page, which can generate safety warnings in browsers.
To verify and correct mixed content, you can use online tools such as "WhyNoPadlock" or "Mixed Content Scan" to identify the mixed elements and manually fix them on your website.
Step 6: Sets Networking 301
It is important to redirect HTTP traffic to HTTPS to ensure visitors always access the secure version of your site. You can do this by setting up 301 redirects. Here's an example of how to do this using the .htaccess file on your server:
RewriteEngine On RewriteCond %{HTTPS} off RewriteRule ^(.*)$ https://%{HTTP_HOST}%{REQUEST_URI} [L,R=301]
Step 7: Checks Settings of your SSL
Once you've done all of the above steps, it's important to check that SSL has been properly configured on your website. You can do so by visiting your site with .https://- and making sure there are no security warnings in your browser.
Step 8: Update Your Sitemap and Settings of Google Search Console
If you have an XML sitemap file, be sure to update it to reflect the new URLs. Then, check and update your settings on Google Search Console to reflect the secure version of your website.
Conclusion
Implementing SSL on a WordPress website is an essential step in ensuring the security and confidence of users. By following these specific steps, you can protect user information, increase trust on your website and meet your visitors' online security expectations. In a world where online security is essential, SSL in WordPress is an essential investment for any website owner.


