Securing your WordPress website with an SSL (Secure Sockets Layer) certificate is one of the most important steps you can take to protect your visitors’ data and build trust. Fortunately, installing SSL on a WordPress site is relatively straightforward, and it offers significant benefits, including improved security, better search engine rankings, and increased user confidence.
In this step-by-step guide, we'll walk you through the process of installing an SSL certificate on your WordPress website, covering both automatic and manual methods.
Why Install SSL on WordPress?
Before diving into the installation process, let’s quickly review why SSL is so important for WordPress websites:
- Security: SSL encrypts the data transmitted between your users’ browsers and your server, protecting sensitive information such as passwords, credit card numbers, and personal details from being intercepted by hackers.
- SEO Benefits: Search engines, especially Google, prioritize secure websites. Sites with SSL receive a ranking boost in search results, which can help drive more traffic to your WordPress site.
- Trust and Credibility: Websites with SSL display a padlock icon and "HTTPS" in the browser’s address bar. These visual cues signal to users that the site is secure, building trust and encouraging them to interact with your content or complete purchases.
Now that you understand the benefits, let’s move on to the actual installation process.
Step 1: Choose the Right SSL Certificate
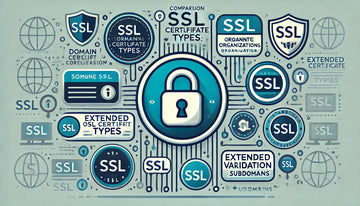
The first step is selecting the right SSL certificate for your WordPress site. There are three main types of SSL certificates to choose from, depending on your needs:
- Domain Validated (DV): Provides basic encryption and is ideal for blogs and personal websites. It’s easy to obtain and install.
- Organization Validated (OV): Offers more extensive validation, verifying the organization behind the website. This is suitable for small to medium-sized businesses.
- Extended Validation (EV): Offers the highest level of trust and displays a green address bar with the company’s name. It’s perfect for e-commerce sites and larger organizations.
Many hosting providers offer free SSL certificates, such as those from Let’s Encrypt. For more advanced needs, you can purchase an SSL certificate from a trusted certificate authority like Comodo, DigiCert, or GlobalSign.
Step 2: Install SSL via Your Hosting Provider
Most WordPress hosting providers make it easy to install SSL certificates, often with a one-click setup process. Here’s how to do it on popular hosting platforms:
Installing SSL on Bluehost
- Log in to your Bluehost account.
- Navigate to the My Sites tab and select the website you want to secure.
- Click on the Security tab and look for the Free SSL Certificate option.
- Toggle the Free SSL switch to enable SSL for your site.
- Bluehost will automatically install the SSL certificate, and your website will start using HTTPS.
Installing SSL on SiteGround
- Log in to your SiteGround account.
- Go to Site Tools and select the website you want to secure.
- Navigate to Security > SSL Manager in the left-hand menu.
- Choose the Let’s Encrypt option from the dropdown menu and click Get.
- SiteGround will install the SSL certificate, and you’ll receive a confirmation message once it’s complete.
Installing SSL on HostGator
- Log in to your HostGator account.
- Navigate to Hosting > Manage > Security.
- Look for the SSL Certificates section and click on Activate next to the Let’s Encrypt option.
- HostGator will automatically install the SSL certificate, and your website will switch to HTTPS.
Each hosting provider may have slightly different steps, but most offer a simple interface for enabling SSL.
Step 3: Update Your WordPress Settings
Once your SSL certificate is installed, you’ll need to update your WordPress settings to ensure your site uses HTTPS instead of HTTP. Follow these steps:
- Log in to your WordPress dashboard.
- Go to Settings > General.
- In the WordPress Address (URL) and Site Address (URL) fields, update your website’s URLs to use “https://” instead of “http://”.
- Click Save Changes to update your settings.
Step 4: Install the Really Simple SSL Plugin
To make sure your entire website is using HTTPS, you can install the Really Simple SSL plugin, which automatically detects your SSL certificate and configures your WordPress site for secure connections.
Here’s how to install and activate the plugin:
- Log in to your WordPress dashboard.
- Go to Plugins > Add New and search for “Really Simple SSL.”
- Click Install Now and then click Activate once the plugin is installed.
- The plugin will automatically detect your SSL certificate and configure your site to use HTTPS.
The plugin also handles redirects from HTTP to HTTPS, ensuring that all visitors are directed to the secure version of your site.
Step 5: Set Up 301 Redirects from HTTP to HTTPS
Even with SSL installed, visitors may still access the HTTP version of your website, especially if they have bookmarked or linked to the old URLs. To ensure all traffic is redirected to the HTTPS version, you’ll need to set up 301 redirects.
The Really Simple SSL plugin automatically handles this, but if you prefer to set up redirects manually, you can do so by editing your .htaccess file. Here’s how:
-
Access your site’s .htaccess file via your hosting control panel or FTP client.
-
Add the following code to the top of your .htaccess file:
This code ensures that all traffic is redirected from HTTP to HTTPS, preserving your website’s SEO rankings and ensuring that visitors access the secure version of your site.
Step 6: Update Internal Links and Resources
To avoid “mixed content” warnings, you’ll need to ensure that all internal links, images, and other resources on your site use HTTPS instead of HTTP. Mixed content occurs when a secure HTTPS page loads resources (such as images, scripts, or stylesheets) over an insecure HTTP connection, which can compromise the security of the page.
You can use the Better Search Replace plugin to easily update internal URLs:
- Install the Better Search Replace plugin from the WordPress Plugin Directory.
- After activating the plugin, go to Tools > Better Search Replace.
- In the Search for field, enter “http://yourdomain.com”.
- In the Replace with field, enter “https://yourdomain.com”.
- Select the tables you want to search (such as wp_posts and wp_postmeta).
- Run the search and replace process to update your internal links.
This ensures that all your content is loaded over HTTPS, improving security and avoiding mixed content warnings.
Step 7: Test Your SSL Installation
After completing the installation and configuration process, it’s important to test your SSL setup to ensure everything is working correctly. Use an online tool like Why No Padlock or SSL Labs to test your SSL certificate and identify any potential issues.
These tools will provide a report showing whether your certificate is properly installed, whether your site has any mixed content, and whether all pages are being served over HTTPS.
Conclusion: Securing Your WordPress Site with SSL
Installing an SSL certificate on your WordPress site is essential for securing user data, improving SEO, and building trust with your visitors. By following the steps outlined in this guide, you can easily install SSL and ensure that your website uses HTTPS across all pages and resources.
Whether you’re running a small blog or an e-commerce store, SSL is a critical component of your website’s security. Make the switch today and enjoy the benefits of a secure, trusted WordPress site.


