Online security is essential in the current digital world, and one of the key components of a website security is the implementation of an SSL (Secure Sockets Layer) certificate. An SSL certificate ensures that the information transmitted between the web server and users is encrypted and protected from unauthorized access. In this article, we will provide you with a detailed and step-by-step guide on how to install an SSL certificate on different types of web servers.
Step 1: Acquires SSL Certificate
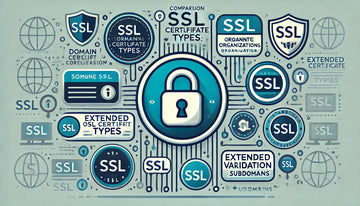
Before you start the installation, you must purchase an SSL certificate. You can get it from a trusted broadcaster (Certificate Authority, CA) or through your hosting provider. Be sure to choose the type of certificate that best suits your needs, either a Domain Validation Certificate (DV), Organization Validation Certificate (OV) or Extended Validation Certificate (EV).
Step 2: Generates a Certificate Signing Application (CSR)
For a certificate issuing your SSL certificate, you need to generate a Certificate Signing Application (CSR). This is done on the web server where you plan to install the certificate. The exact steps to generate a CSR may vary depending on the web server you are using. Here are a few examples:
- For Apache: Use the OpenSSL command to generate a CSR along with a private key. Then, complete a form with the information necessary for the request.
- For Nginx: As with Apache, you can use OpenSSL to generate a CSR and a private key. Then, complete the application form.
- For Microsoft IIS: Use the Internet Services Manager (IIS) tool to generate a CSR. You must complete the form with the required details.
Step 3: Send the Certificate Application
Once you have generated the CSR, send it to the certificate issuing entity along with any additional information you request. This will usually include details about your organization and domain.
Step 4: Verification of Identity
The issuing of certificates shall verify the information provided in the application before issuing the certificate. The verification process may vary depending on the type of certificate you have requested. For EV certificates, validation is more rigorous and may require additional documentation to confirm your organization's identity.
Step 5: Receive and Download SSL Certificate
Once the certificate issuing entity has completed the verification, it will send you the SSL certificate. Normally, you will receive a file with extension .crt. or .pem. Make sure you keep this file secure, as it will be necessary during the installation process.
Step 6: Install the Certificate in your Server
Installation of the SSL certificate varies according to the web server you are using. Here is an overview of how to install it on some of the most common web servers:
- For Apache: You must configure Apache to load the certificate file and the private key in its configuration. This is usually done in the configuration file at httpd.conf. or in a site-specific configuration file.
- For Nginx: In Nginx, you must edit the server settings to include the location of the certificate file and the private key. This is done in the Nginx configuration file, which is usually found in ./etc/nginx/nginx.conf.
- For Microsoft IIS: In IIS, it uses the Internet Services Manager (IIS) tool to complete the installation process. Import the certificate and share with the corresponding website.
Step 7: Configures the Website to Use HTTPS
Once you have installed the SSL certificate on your web server, you must configure your website to use HTTPS instead of HTTP. This is usually done in the website settings or in the server configuration file. Be sure to update any internal link to use "https," instead of .http://.
Step 8: Try Settings
Before considering that the installation is complete, perform thorough tests to ensure that the SSL certificate works properly. Check that the website is loaded without problems and that the connection is encrypted. You can also use SSL online verification tools to confirm that everything is configured correctly.
Step 9: Renewals and Maintenance Program
SSL certificates have an expiration date, so it is important to schedule renovations in advance. Most certificates are issued valid for 1 to 2 years. Be sure to keep a record of the expiration date and schedule the renewal well in advance to avoid interruptions in the security of your website.
Conclusion
Installing an SSL certificate is a key step in ensuring the security and privacy of data on your website. If you follow these steps carefully and make sure you understand your web server's specific settings, you can successfully implement an SSL certificate and provide your users with a secure and encrypted HTTPS connection. Online security is a priority, and an SSL certificate is an essential tool to achieve it.


