


How to generate a CSR for Microsoft IIS 10
The instructions below walk you through generating a CSR on Microsoft IIS 10. For more on CSRs and why your private key matters, see our Certificate Signing Request overview. If you have already generated the CSR and received your trusted SSL certificate, see our IIS 10 SSL installation instructions and skip the steps below.
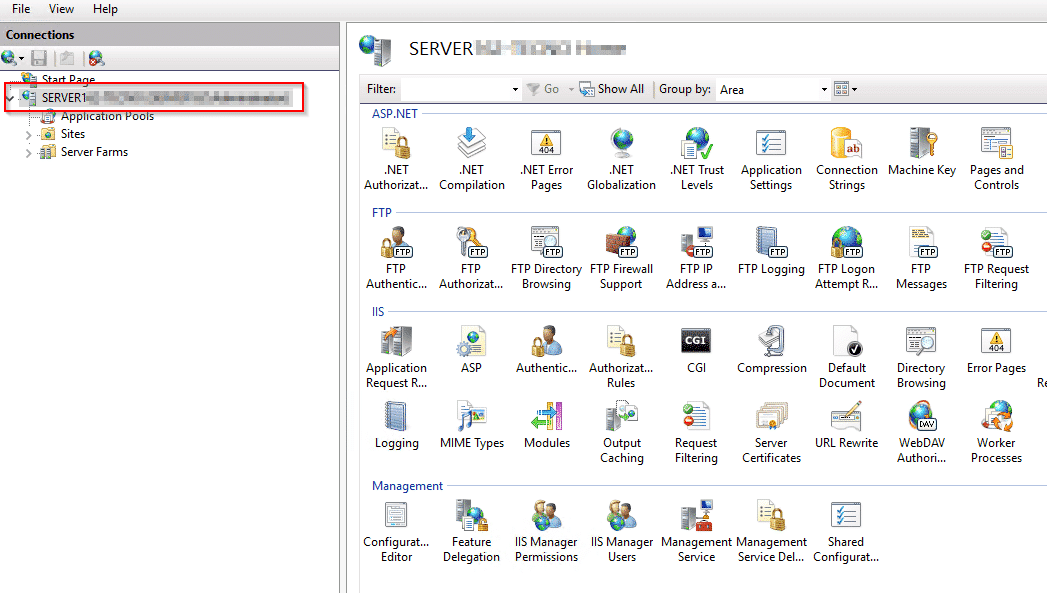
1. Open the server in IIS
Start IIS Manager and click the server name in the Connections menu on the left.
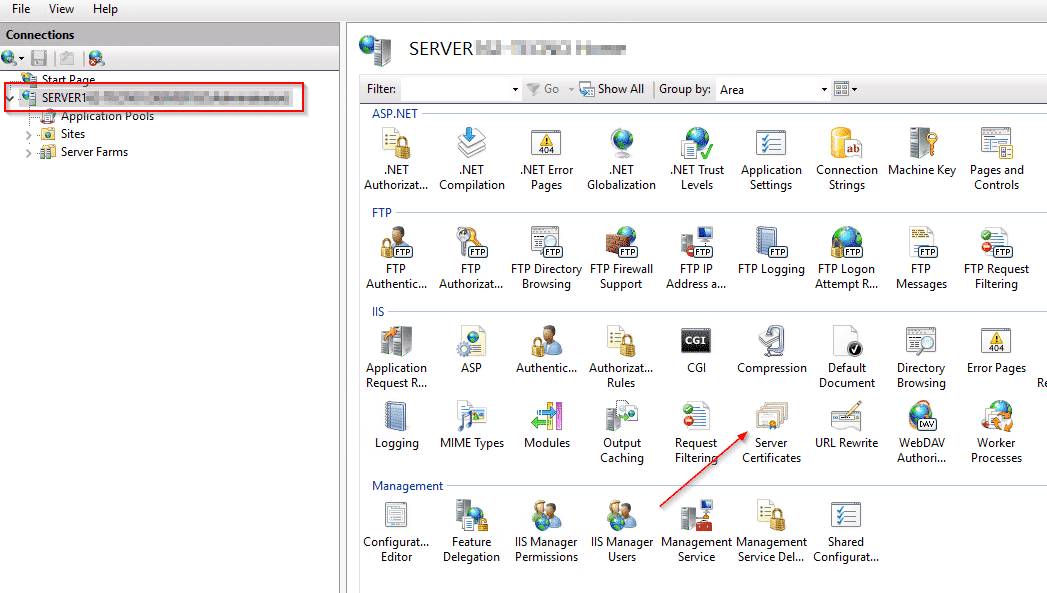
2. Open the Server Certificates manager
On the server's home page, find the IIS section in the middle pane and double-click Server Certificates. The Server Certificates panel opens in the middle pane.
3. Create the certificate request
- In the Actions menu on the right, click Create Certificate Request… The Request Certificate wizard opens in a new window.
- Fill in the Distinguished Name Properties:
- Common name: has to be a fully qualified domain name (FQDN) such as "domain.com".
- Organisation: the legal name of your organisation. If you have no company or organisation, you can put another name here, or N/A.
- Organisational unit: your department within the organisation. If you have no organisation, put N/A.
- City/locality: your city.
- State/province: your state or region. Do not abbreviate this — use "Florida" rather than "FL".
- Country: your country, chosen from the drop-down.
Click Next when you are ready to carry on.
4. Cryptographic Service Provider Properties
On the Cryptographic Service Provider Properties page, choose the following from the drop-downs:
- Cryptographic service provider: Microsoft RSA SChannel Cryptographic Provider
- Bit length: 2048
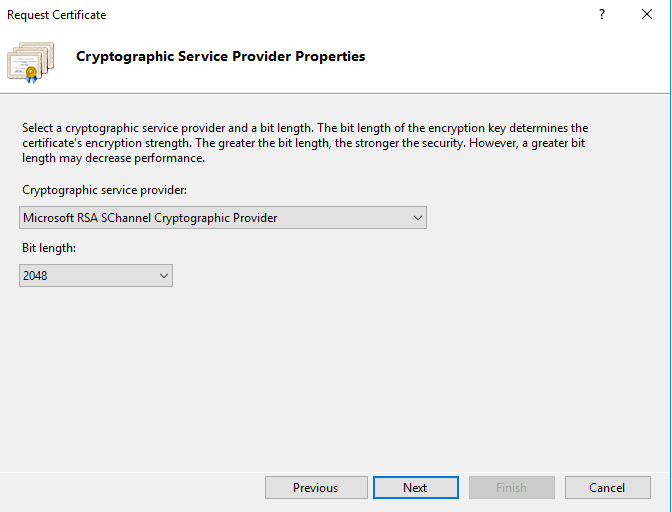
These are the standard options, but you can choose differently if you need to.
5. File name
On the File Name page, click the … box to choose a name and a location to save your CSR file to. The default directory is C:\Windows\System32. Click Finish when you are ready.
6. Find the CSR on your system
Go to the directory you saved your CSR file in and open it in Notepad or your preferred text editor.
7. Generate your SSL certificate
Go back to the generation form on our website and paste the whole CSR into the empty text box. Then finish the rest of the order form and submit it when you are ready. You should receive a vendor order ID, and your certificate enters validation.
After validation is complete and the certificate authority has issued your trusted SSL certificate, carry on with our Microsoft IIS 10 SSL installation instructions.


